We cancelled our travel plans over the Christmas holidays, because of the pandemic. So, I set on a challenge to find the perfect video conferencing setup to make the most out of the virtual get-togethers with friends and family!
Virtual Christmas?
Ever since we moved to Germany more than 10 years ago, we always went back to Bulgaria for the Christmas holidays to visit our families. It is also an opportunity for our 2 years-old son Leo to spend some time with his grandparents and aunts 😀.
However, with COVID-19 raging everywhere in Europe, we decided it is not worth the risk travelling and gathering with many people indoors. I was not going to sit around and whine, though, so I set on a challenge to make the best of the situation! How could I create a video conference setup allowing us to meet with multiple people and let Leo play and interact with them? 🤔
The Challenge
Now, you may think this is not really a big challenge... Everybody has a smartphone, so why not simply do a video call? Well, this was not good enough for me! Or maybe I just wanted to play around with my gadgets and find an excuse buy some new ones... 🤷♂️
The goal is to have an interactive video conference setup in Leo's room, so we could spend time with friends and family. I want him to be able to talk to the people on the other side of the call, play with them and feed them some wooden pizza 😁. The setup has to meet the following criteria:
- 👐 Hands free - I don't want to be holding the camera all the time.
- 📱 Flexible - the camera should be moveable to capture the action up close. Ideally, I would be able to switch to my phone if Leo runs to another room.
- 🎥 Wide field of view - the camera should be able to see as much as possible of the room, so I don't have to move it every time Leo runs to the other side.
- 🖥 Big screen - Leo should be able to see the people in the video conference and interact with them.
- 🎙 Good sound - people should be able to hear us even when we are talking from the other side of the room.
- 🌃 Good light sensitivity - I want to have a reasonably good quality with the interior lighting, when it is dark outside.
- 📺 Streaming - multiple people should be able to join and leave whenever they want, while we are streaming.
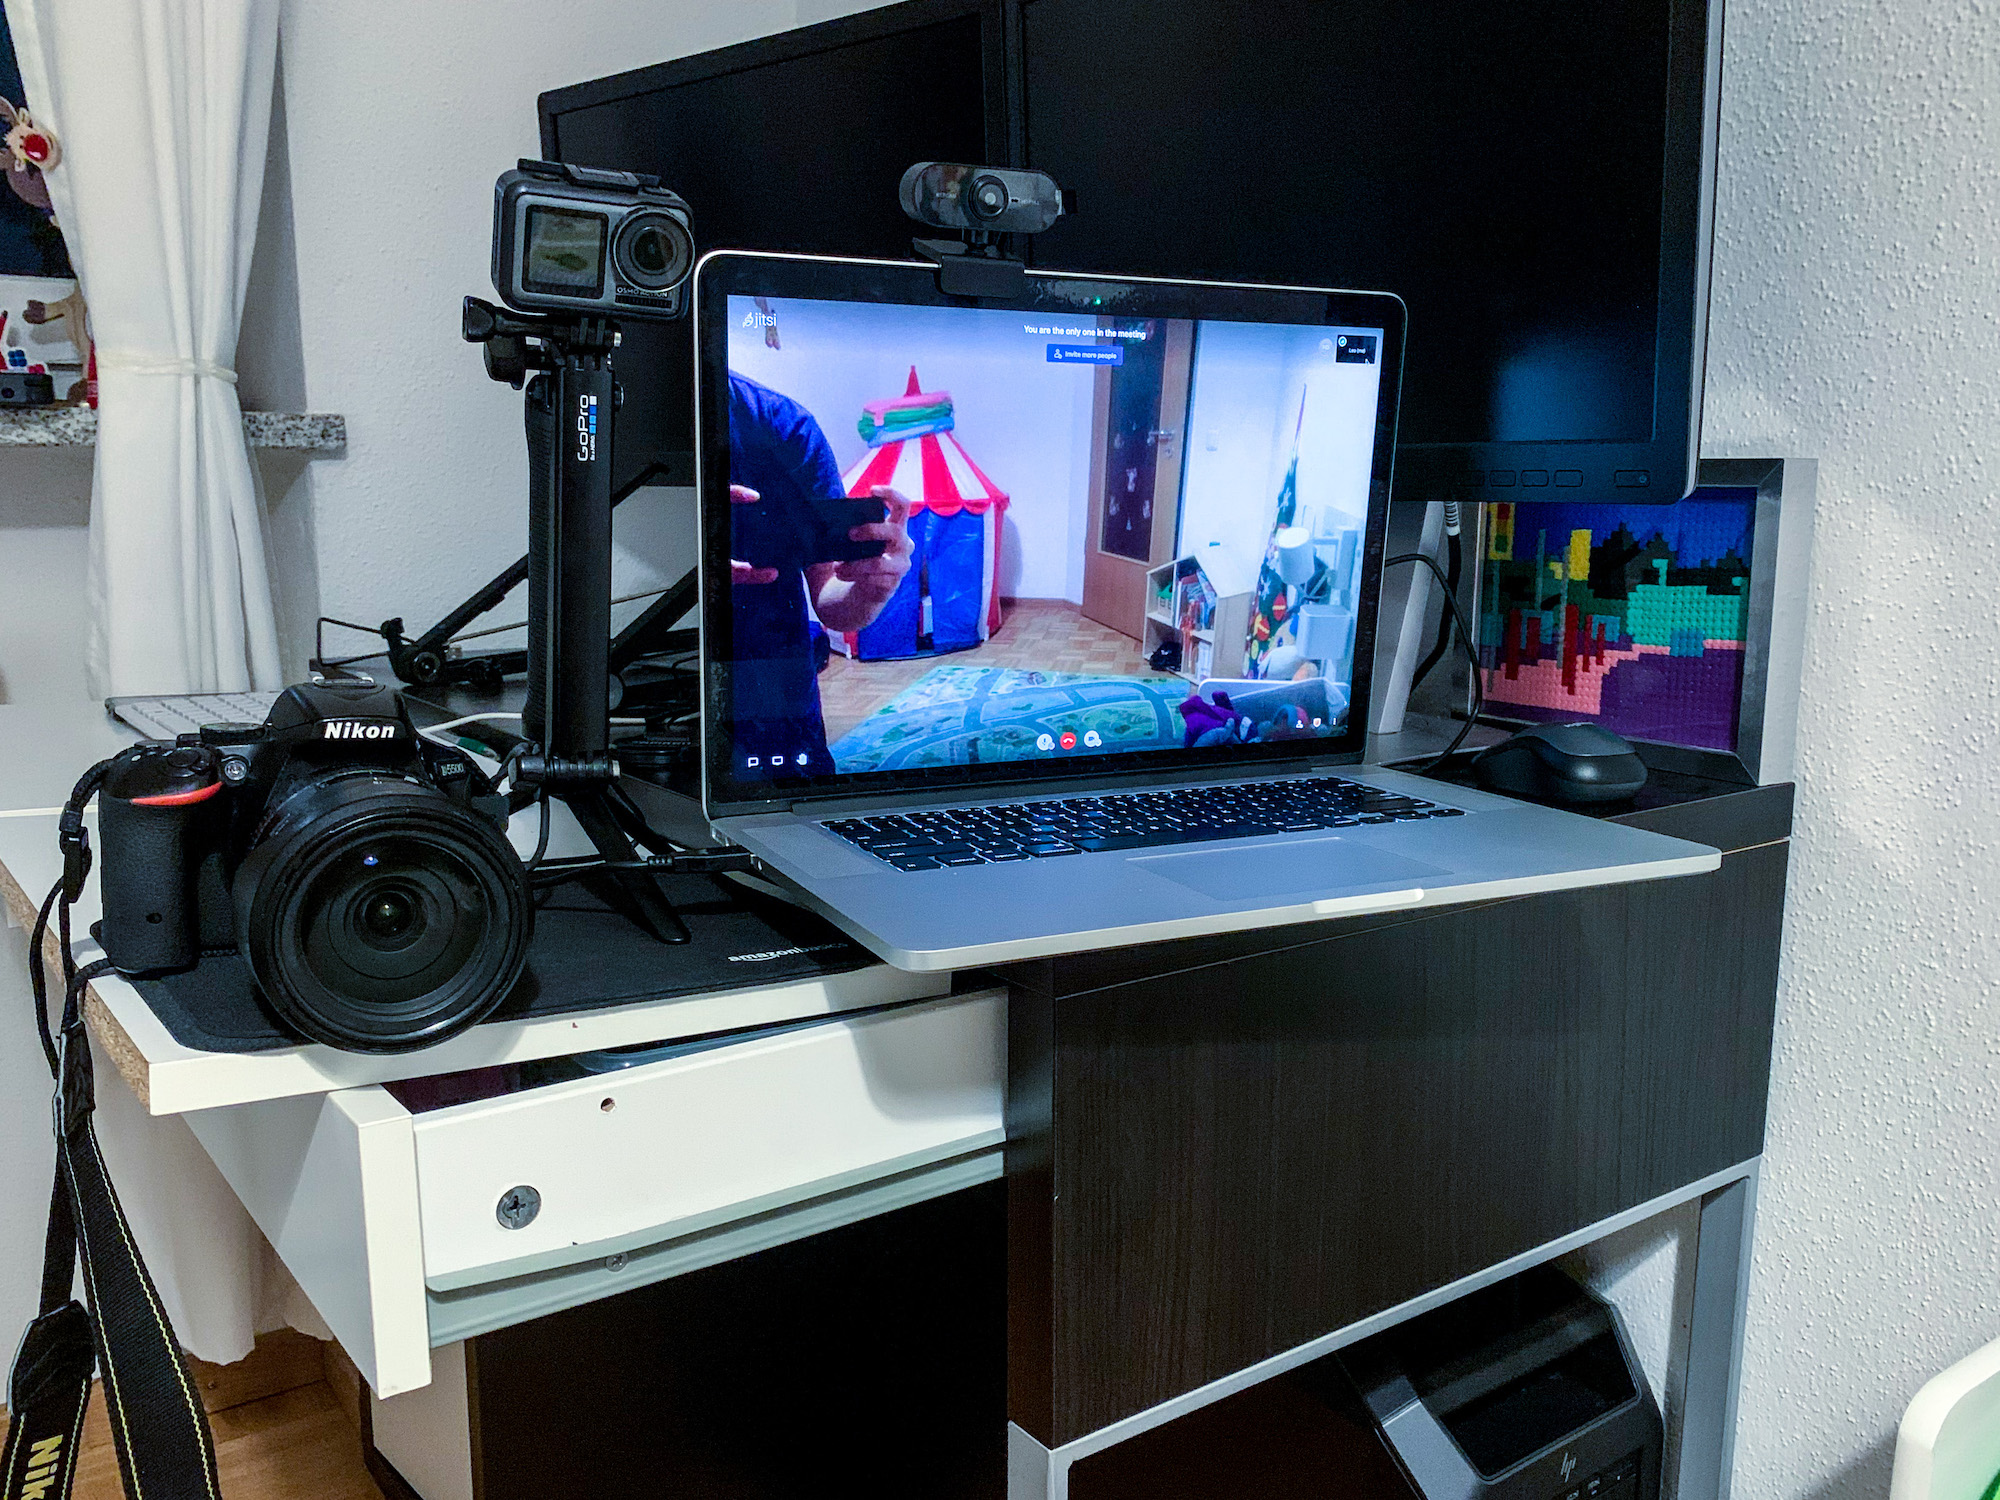
The basic setup
I decided to use my 15.6" MacBook Pro as the main device for doing video calls using Jitsi Meet. During the lockdown in April, we were using it for virtual coffee breaks with colleagues and the experience was great. It is free and easy to use on smartphones, tablets and laptops. I can also connect to the call in parallel with my phone, if I need to go to another room. I would then just open a conference on Jitsi and send the link in a WhatsApp group with friends and family and whoever has time would join.
The MacBook's integrated microphone is good enough so that people can hear us from basically everywhere in the room with decent quality. It also has a big enough screen for us to see the other people on the call. The situation with the camera wasn't as that simple, though...
Testing different cameras for the streaming setup
Attempt 1 - the MacBook's integrated camera
My first (and admittedly quite naive) attempt was to just use the integrated webcam of the MacBook. The problem is that integrated laptop cameras suck! Joanna Stern from the Wall Street Journal has a great video on the topic. The quality of the image is really poor and the opening angle isn't great either - about 66° horizontal field of view. You can read below about my highly scientific method for measuring the camera's opening angle 😁.
The very noisy MacBook Pro integrated camera image
Attempt 2 - buy a dedicated webcam
My next (also quite naive) reaction was to go to Amazon and buy a cheap and high-quality (🤦♂️) webcam. I didn't want to spend too much money for a webcam that I wouldn't be using much otherwise. My assumption was that by now the technology is so advanced, that high-quality sensors and lenses are very cheap. I was wrong...
I ended up browsing through endless lists of seemingly identical webcams for about 30€. I ended up buying this one from NIYPS. It had very good reviews and promised Full HD resolution, wide angle and "clear images ... even in poor backlight". Turned out that it delivers upscaled 720p video, had very narrow viewing angle (about 42°) and the video quality was poor 😖. While the image was more or less sharp, the colors were terrible in all conditions.
I also incidentally stumbled upon this article on Hacker News and lost my hope to find a good webcam at a reasonable price - Why can't you buy a good webcam? So, let's see what else I could find at home...
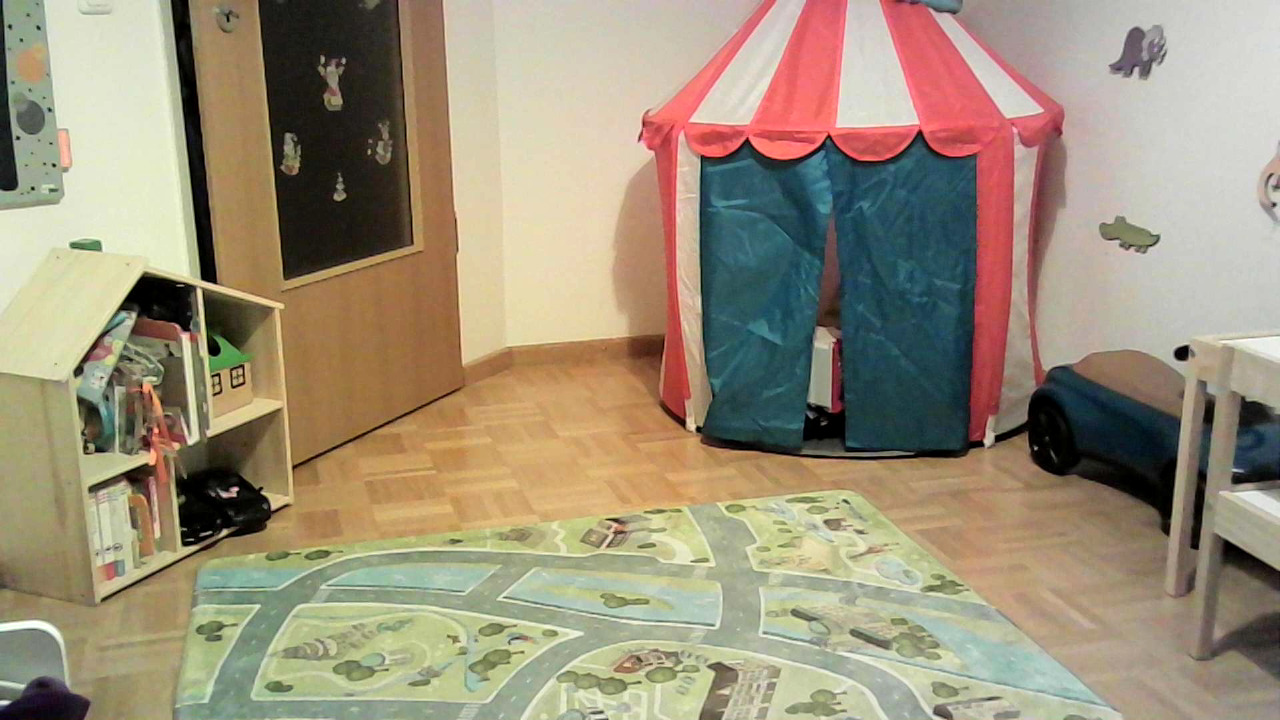
The really poor NIYPS webcam image
Attempt 3 - use my DSLR
My Nikon D5500 with a Tamron 16-300mm lens was just lying around collecting dust - we haven't been travelling much this year for obvious reasons...
I thought, that it can't be that hard to connect it to my laptop and use it as a webcam? Sure enough, Nikon has a Webcam Utility that allows you to do exactly that over a USB connection! There are several super sharp, high-quality images on their website, so it has to be good! Right? Right???
Well, it turned out they are definitely not made in "webcam mode". Not only does the webcam video have a mere 640 × 480 resolution, but it also contains a huge black border, so in reality it is something like 400 × 266. Seriously 😵??? What about the promised "incredible sharpness, clarity, and flattering depth of field"?
I researched a bit online why this is the case. It seems that the camera can't process large videos in real-time, so they needed to limit the resolution. Before going back to Amazon and buying a cam link, I had another genius idea... 💡 (vote here if you want me to write more about cam link).
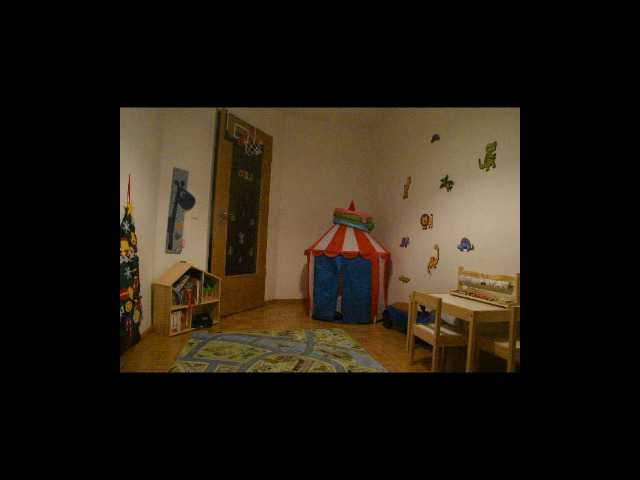
Is this a joke? Nikon D5500 as a webcam
Attempt 4 - use my Osmo Action camera
Last year I upgraded from my old GoPro HERO3 to a DJI Osmo Action camera that I typically use while travelling (if you want to read about the DJI Osmo, vote here ). It is high-quality, portable and has a wide opening angle! Getting it to run as a webcam is not trivial, though - I needed to buy a special software tool to connect it to the MacBook. The good thing is, that you can do this it over Wi-Fi and you don't need to deal with cable. The whole process is a bit tricky and the software is buggy, but once it works, it works very well!
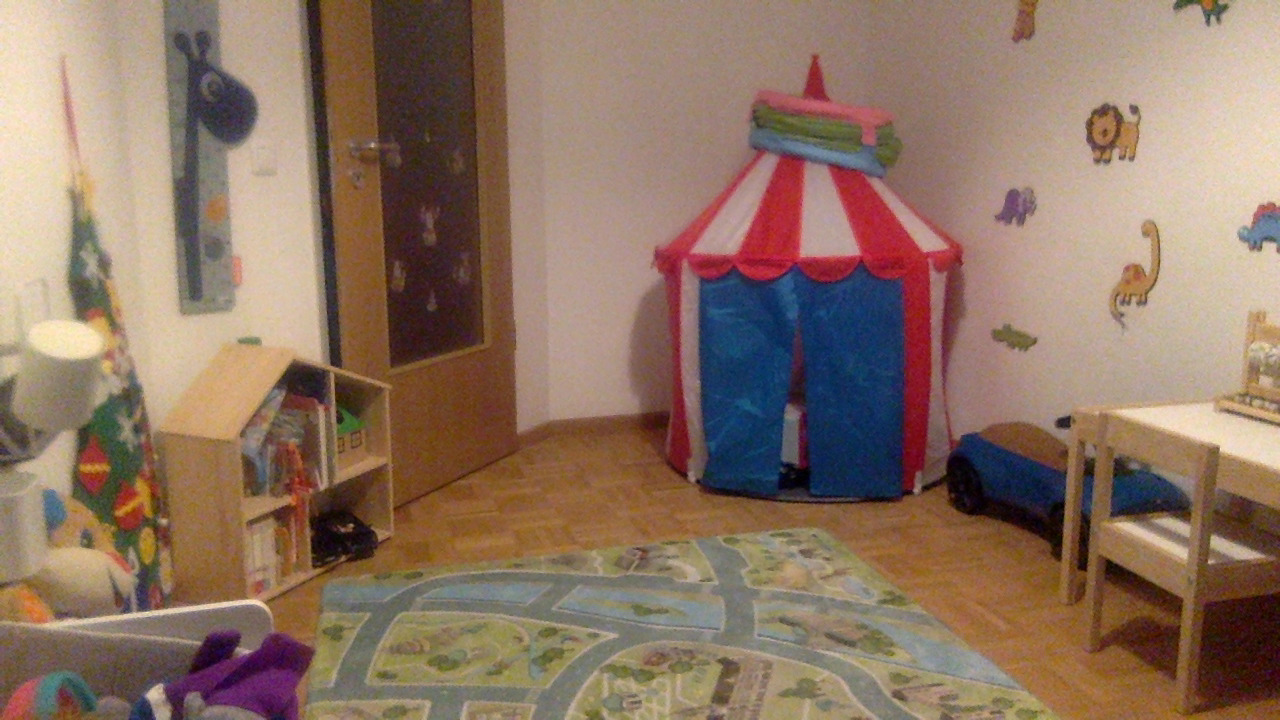
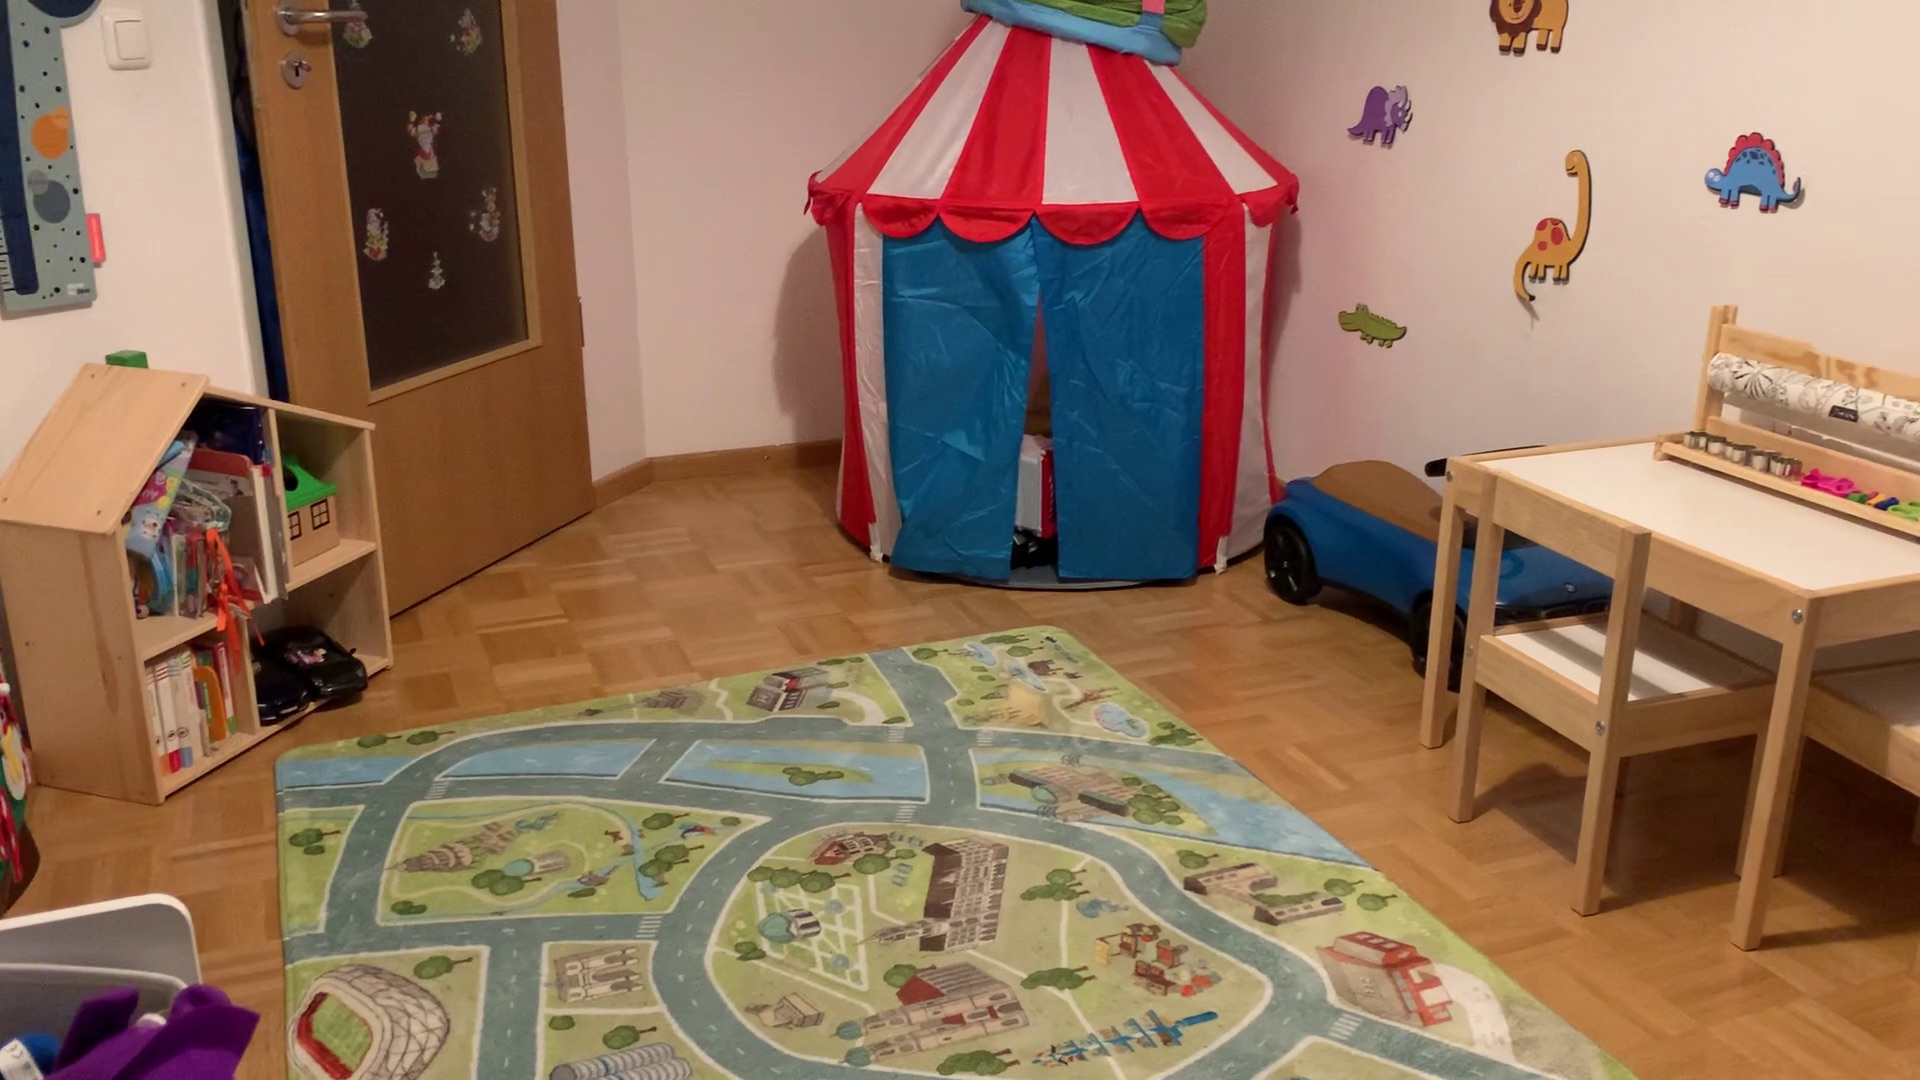
While the camera can record 4K video, for some reason the firmware doesn't allow streaming at a resolution higher than 720p. The horizontal field of view seems also limited to about 100° (from 120°), but it's still much wider than any other available option. It made a huge difference, because you could now see almost the whole room and get a better feeling what's going on.
I used this setup several times already and it works really well. I put the Osmo on a tripod from my old GoPro and I can easily move it at different places in the room. The image quality is far from perfect, but the wide opening angle compensates for that. This has become my main camera for now!
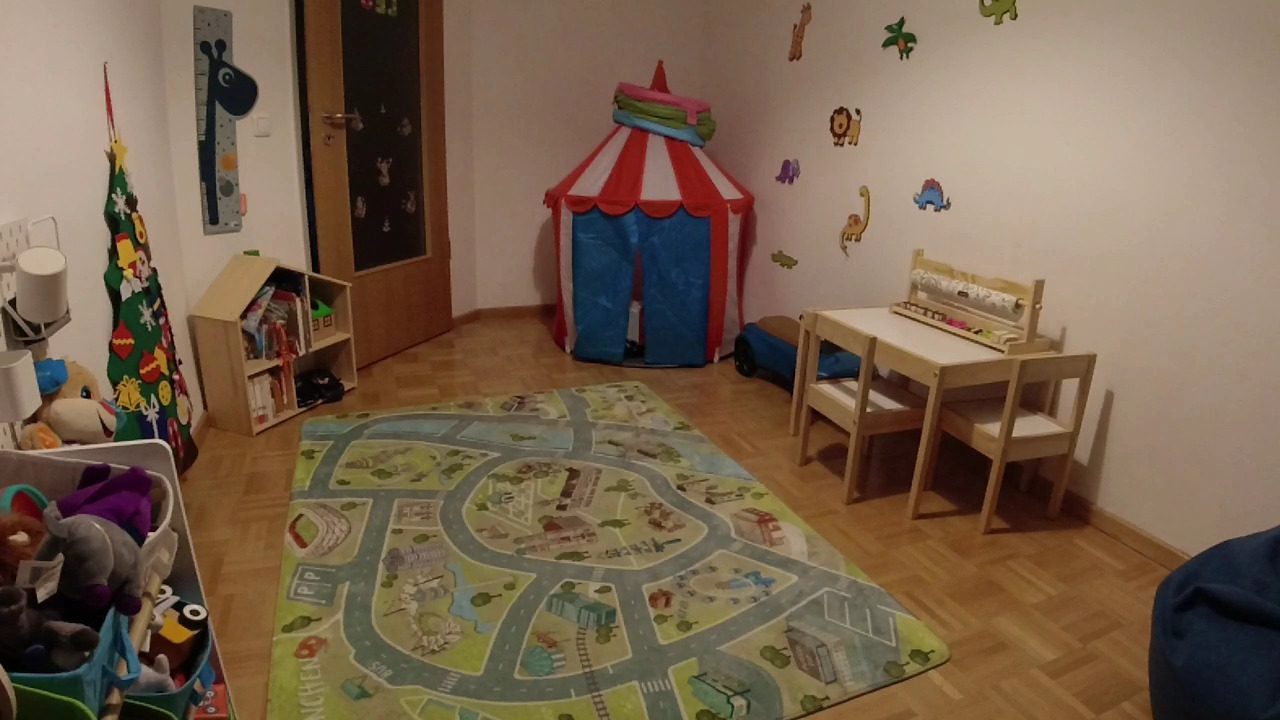
The wide-angle view from the DJI Osmo Action
Further Improvements
This setup works great now, but I'm thinking about several ways to make it even better.
Sound
While the MacBook's integrated microphone seems to work good in most cases, it can be better especially from the other side of the room. I tried enabling the mic on the Osmo, but then it starts picking up the sound from the speakers, creating an unpleasant audio feedback.
I bought a cheap omnidirectional mic with a long cable, with the idea to position it in the middle of the room. Unfortunately, as soon as I plug it in, the integrated speakers of the MacBook are deactivated. It seems that this is a hardware switch, which cannot be configured in software... 🤷♂️ I currently don't have any other external speakers I can use, but I'm waiting for my HomePod Mini to arrive in January. With it I should be able to improve the sound quality significantly.
Screen
I usually put my MacBook on the makeshift desk where I have my workstation from work during the corona times. So, right next to the laptop I actually have two much bigger screens! However, if I want to use them, I will have to push the laptop back which will be a problem for the microphone. As soon as, I solve the sound problem above, I should also be able to switch to the bigger monitor.
Camera
I'm still not quite happy with the quality of the video form the Osmo... The back camera of my iPhone XS delivers a way better image, so I plan to buy a smartphone tripod and give it a try. The problem with using the iPhone is that it has a much smaller opening angle than the Osmo. I have to see if it is worth it... Or maybe I need an iPhone 12 Pro with the wide-angle lens... 🤔

The front camera of the iPhone XS is a bit noisy
The back camera of the iPhone XS is great
Conclusion
In the end, I was able to create a decent streaming setup, by mostly reusing hardware that I already had lying around at home. While the experience is not the same as in person, it works surprisingly well! All my family in Bulgaria is now able to spend time with Leo and drink some imaginary coffee he is serving them 🤷♂️. Always try to do the best of what is under your control! 💪
Bonus: How to quickly measure the opening angle of a camera?
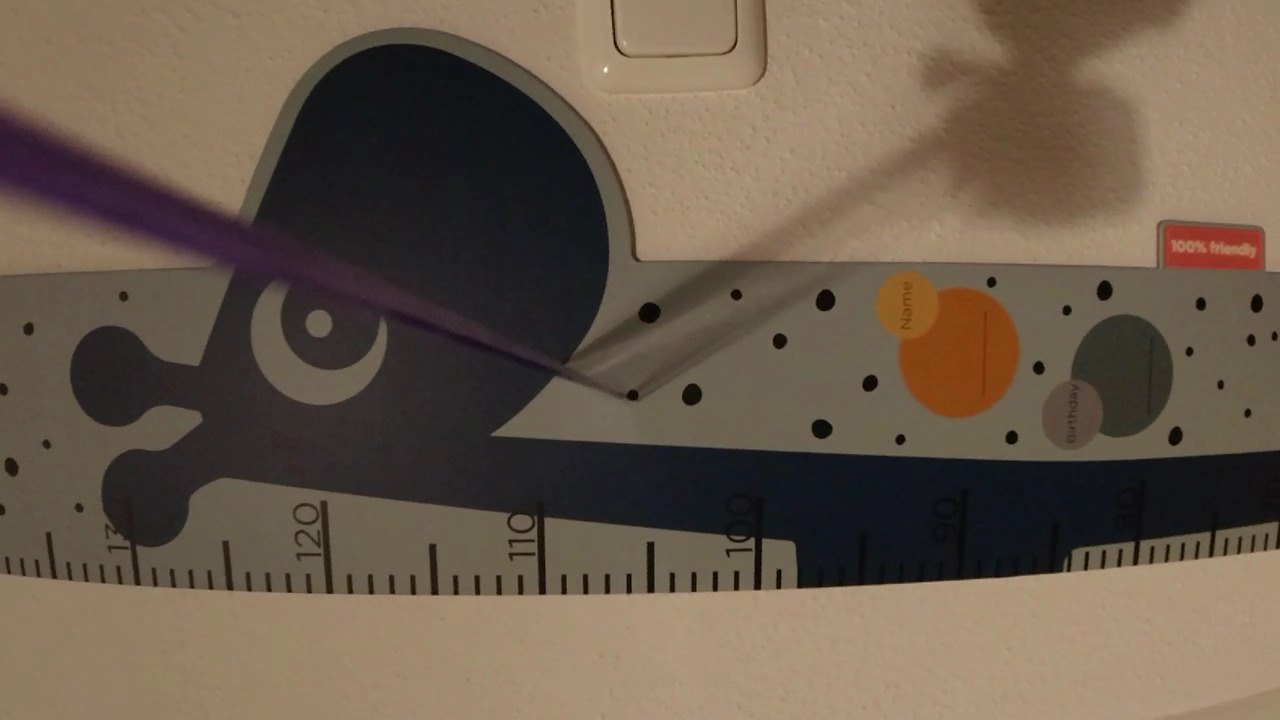
The image used to compute the opening angle of the Osmo Action as a webcam
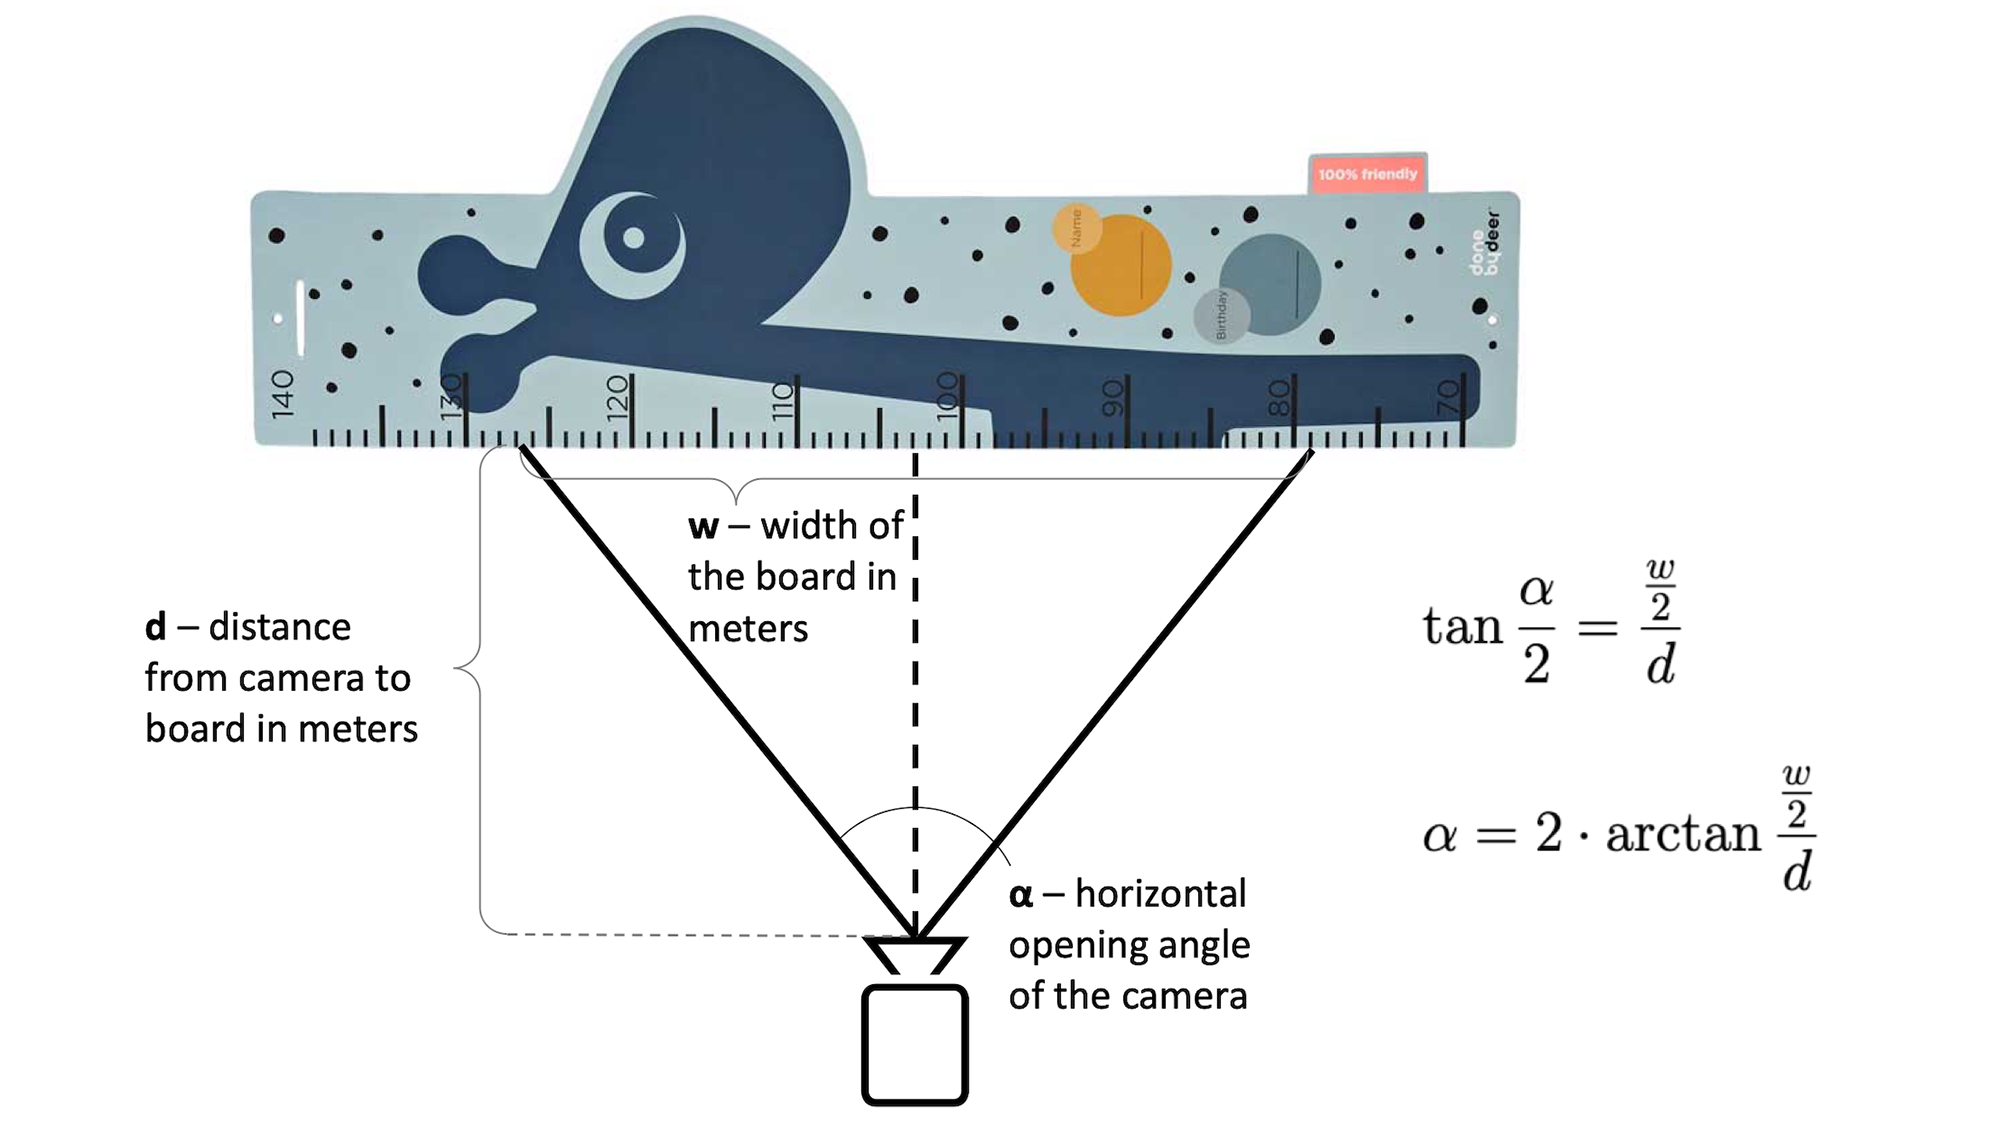
How to (approximately) calculate the horizontal opening angle of a camera
While comparing the different cameras, I wanted to know their horizontal field of views. However, it turned out that this information is often difficult to find online. I thought about printing out a checkerboard and calibrating the cameras with OpenCV, but it would have been an overkill 😅. So, in a highly sophisticated and scientific manner, I decided to use my son's giraffe height chart... 🤷♂️
I positioned the camera rotated at 90° in front of the height chart at a distance of 31 cm (propping it with a ruler). This allowed me to measure the width of the chart that is visible in the camera and the rest is some basic trigonometry. As you can imagine, the accuracy is not very high, but it is enough for my use-case 😄. If you want me to write more on this topic, please vote here .
If you like the article or have comments, please like, retweet or reply here. If you like my writing, please follow me on Twitter.